Welcome to Grandma’s Crafts! I’m so happy you are here today. Some Christmas crochet projects are sweet and traditional, and others are made simply to bring a little fun to the season. This playful green fringe hat definitely belongs in the second group.
There is something about a playful holiday hat that instantly puts me in a good mood. It does not need to be fancy or complicated to feel special. Sometimes the projects we remember most are the ones that make us smile while we are making them.
I also love how this hat mixes a classic ribbed texture with something a little unexpected.
From a distance, it looks like a cozy winter beanie, but then you notice the curls at the top and that little red bow and suddenly it has so much personality.
Perfect gift!
This is also the kind of project that would be so fun to make for family photos, Christmas morning, or even as a handmade gift for someone who loves festive things. You could easily make a few in different sizes and turn it into one of those holiday projects everyone talks about year after year.
The bright green ribbing, curly fringe at the top, and little red bow give this hat such a cheerful personality. It has that wonderfully mischievous holiday look, but the construction itself is surprisingly simple.
The hat is worked flat from side to side, so there is no complicated shaping in rounds. The ribbed fabric is created with half double crochet worked in the back loop, while the curls are crocheted directly into the crown edge as you go. Once the rectangle is wide enough, the sides are joined and the top is gathered underneath the fringe.
Best of all, there is no separate pile of fringe pieces to sew on afterward.
This pattern is written using US crochet terminology.
Materials
You will need:
Green worsted weight yarn, #4: approximately 200 to 230 yards
Red worsted weight yarn, #4: approximately 20 to 30 yards
5 mm crochet hook
Tapestry needle
Scissors
Stitch marker, optional
Finished Size
The sample size is designed for an average adult head.
Finished circumference: approximately 19 to 20 inches unstretched
Finished height: approximately 9½ to 10 inches, not including the fringe
The ribbing stretches comfortably, so the finished hat should measure slightly smaller than the actual head circumference.
Gauge
Approximately:
14 hdc stitches = 4 inches
10 to 11 rows = 4 inches
Gauge does not need to be absolutely perfect for this project, but it will help you achieve the intended size.
Abbreviations
ch = chain
sc = single crochet
hdc = half double crochet
sl st = slip stitch
BLO = back loop only
st(s) = stitch(es)
Pattern Notes
The hat is worked side to side in rows.
The starting chain determines the height of the hat.
The total number of rows determines the circumference.
The first few stitches along the crown edge are worked as slip stitches. This creates a slightly tighter upper edge and helps the crown gather more neatly when the hat is finished.
The curly fringe is crocheted directly from the crown edge during selected rows.
You can easily adjust the length or fullness of the fringe by changing the number of chains or adding curls more frequently.
Hat
With green yarn:
Ch 38.
Row 1
Hdc in the 3rd ch from the hook and in each ch across.
You should have 36 sts.
Ch 1 and turn.
Row 2
Working in BLO:
Sl st in the first 4 sts.
Hdc in BLO in each remaining st across.
Ch 1 and turn.
Row 3
Hdc in BLO in each st until 4 sts remain.
Sl st in BLO in the final 4 sts.
You are now at the crown edge.
Ch 16.
Working back down the chain, place 2 sc in each ch.
The extra stitches will cause the chain to curl naturally.
When you reach the base of the curl, ch 1 and turn.
Row 4
Sl st in BLO in the first 4 sts.
Hdc in BLO across the remaining stitches.
Ch 1 and turn.
Row 5
Hdc in BLO until 4 sts remain.
Sl st in BLO in the final 4 sts.
Do not add a fringe curl on this row.
Ch 1 and turn.
Row 6
Sl st in BLO in the first 4 sts.
Hdc in BLO across.
Ch 1 and turn.
Row 7
Hdc in BLO until 4 sts remain.
Sl st in BLO in the final 4 sts.
At the crown edge:
Ch 16.
Work 2 sc in each chain back toward the hat.
Ch 1 and turn.
Row 8
Sl st in BLO in the first 4 sts.
Hdc in BLO across.
Ch 1 and turn.
Continue the Hat
Repeat Rows 5 through 8 until the rectangle measures approximately 19 to 20 inches across, ending after a Row 6 or Row 8.
You should have a row of curls spaced evenly along one long edge of the rectangle.
For a fuller fringe, you can add a curl every time you reach the crown edge.
For a lighter fringe, add one every six rows instead.
Checking the Fit
Before joining the hat, wrap the rectangle gently around the head.
The ends should meet with a slight stretch.
Because the ribbing is very flexible, the hat should not fit loosely before seaming.
Add or remove rows if necessary.
Joining the Hat
Fold the rectangle so the first and last rows meet, with the right sides facing each other.
Using green yarn, slip stitch through both layers to join the edges.
You can also sew the seam with a tapestry needle if you prefer a flatter finish.
Fasten off, leaving a long tail approximately 18 to 20 inches long.
Turn the hat right side out.
Closing the Crown
Thread the long yarn tail onto your tapestry needle.
Working approximately ½ inch below the curly fringe, weave the needle in and out around the entire crown edge.
Once you have worked all the way around, pull the yarn firmly.
The opening should gather underneath the fringe, bringing all the curls together at the top.
Wrap the yarn around the gathered section several times for extra security.
Secure firmly and weave in the remaining end.
Arrange the curls with your fingers until the fringe sits the way you like.
Creating the Folded Brim
Fold the lower edge of the hat upward approximately 2 inches.
Because the entire hat is worked in ribbed BLO hdc, the brim should fold naturally and remain stretchy.
You can leave the brim loose or tack it discreetly at the back seam if you prefer.
Red Crochet Bow
The little red bow adds the perfect finishing touch.
With red yarn:
Ch 24.
Row 1
Hdc in the 3rd ch from the hook and across.
Ch 1 and turn.
Rows 2 to 5
Hdc in BLO across.
Ch 1 and turn.
After Row 5, fasten off leaving a long tail.
Bring the short ends of the rectangle together and sew them securely to form a loop.
Position the seam at the center back.
Flatten the loop, then pinch the center tightly between your fingers.
Wrap the long yarn tail around the center several times until the bow holds its shape.
Secure the yarn at the back.
Attaching the Bow
Place the bow directly below the fringe, either at the center front or slightly to one side.
Use the remaining yarn tail to sew through the center of the bow and into the hat several times.
Secure firmly and weave in the remaining end.
Making the Fringe Curlier
If you want really springy curls, try working 3 sc into each chain instead of 2.
For looser curls, use 2 sc in each chain.
For fringe that is more wavy than curly, work 1 hdc in each chain instead.
You can also vary the fringe length slightly by alternating chains of 14, 16, and 18. This gives the top a fuller, more playful appearance.
Adjusting the Size
This construction makes resizing quite easy.
For a shorter hat, begin with fewer chains.
For a deeper hat, add more chains.
For a different head circumference, simply crochet fewer or more rows before joining.
As a general guide:
Child: approximately 17 to 18 inches before stretching
Teen: approximately 18 to 19 inches
Adult Medium: approximately 19 to 20 inches
Adult Large: approximately 20 to 21 inches
Always check the actual fit before seaming, since yarn and tension can affect the finished measurements.
Color Ideas
Of course, bright green and red make this hat wonderfully festive, but the same design can take on a completely different personality with other colors.
Try cream with a burgundy bow for something more traditional.
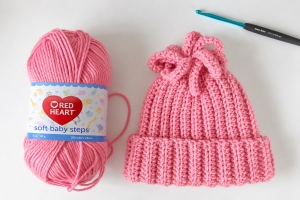
Pink with white fringe would be adorable for a whimsical winter hat.
Deep forest green with a velvet-red bow gives the design a more classic Christmas look.
You could even make several colors for family photos or holiday gifts.
VIDEO TUTORIAL
The video below shows the Daisy Farm Crafts version of this style, so some stitch counts and steps will differ from the written pattern shared here.
There is something especially fun about Christmas crochet projects that do not take themselves too seriously.
If you enjoy this style of hat, Daisy Farm Crafts also has a beautiful Fun Fringe Hat pattern that helped inspire this project. Their version uses its own stitch counts, row sequence and fringe technique, so it is worth taking a look at their original pattern as well. You can find it below.
This hat still has all the things I love in a good winter project: soft ribbing, plenty of stretch, a warm folded brim, and a comfortable fit. Then that curly little fringe and bright bow come along and give the whole thing its personality.
And because the curls are created while you crochet the hat, you do not finish the project only to discover that you still have twenty pieces of fringe to attach.
That might be my favorite part!
Whether you make it for a Christmas party, holiday photos, or just because somebody in the family appreciates a little festive mischief, I hope you have as much fun making this one as wearing it. ❤️💚