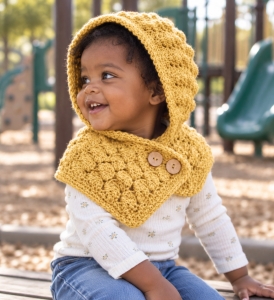
If you are still getting comfortable with textured crochet, I would simply take your time with the first few rows. The stitch repeat is worked by placing a single crochet and two double crochets together in the same stitch, then skipping the next two stitches. Once those clusters begin lining up with the rows below, the pattern becomes much easier to recognize.
This would make such a lovely handmade gift too. It is the kind of project that feels a little more special than a basic winter accessory, but it is still useful enough to actually be worn throughout the colder months. I think it would be especially sweet for a birthday, baby shower, or simply as one of those handmade gifts made because you found a pattern that was too cute to ignore.
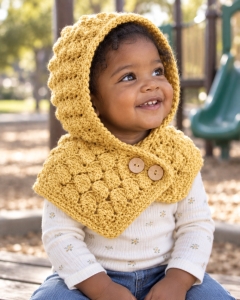
This cozy toddler hood is worked with a simple textured stitch made from single crochet and double crochet. The hood is crocheted as a rectangle, folded and seamed, then attached to a matching scarf.
Skill Level
Easy
Size
Designed to fit approximately 12–24 months.
The stitch pattern is worked in multiples of 3, so the starting chains can be adjusted if you want to experiment with a different size.
Materials
- Big Twist Chunky, weight #5
- Color shown: Bubble Gum
- US K crochet hook
- Yarn needle
- Scissors
- Buttons, optional
Note: The source specifies a K hook but does not give the millimeter size.
Abbreviations
ch = chain
sc = single crochet
dc = double crochet
sl st = slip stitch
st(s) = stitch(es)
Textured Stitch Pattern
The texture is created by working:
(sc, 2 dc) in the same stitch, skip 2 stitches
This combination is repeated across the row.
Hood
Foundation
Ch 25.
Row 1
Work 2 dc in the 4th ch from hook.
Sk next 2 ch.
(Sc, 2 dc) in next ch, sk next 2 ch.
Repeat from * to * across.
Finish with 1 sc in the final ch.
Ch 2, turn.
Row 2
Work 2 dc in the first st.
Sk next 2 sts.
(Sc, 2 dc) in next st, sk next 2 sts.
Repeat from * to * across.
Finish with 1 sc in the final st.
Ch 2, turn.
Rows 3–35
Repeat Row 2 until you have completed 35 rows total.
Fasten off.
Forming the Hood
Lay the crocheted rectangle flat.
Fold it evenly in half so the short edges meet.
Using a yarn needle and matching yarn, whip stitch one edge closed to create the back seam of the hood.
Fasten off securely and weave in the ends.
Scarf
Foundation
Ch 73.
Row 1
Work 2 dc in the 4th ch from hook.
Sk next 2 ch.
(Sc, 2 dc) in next ch, sk next 2 ch.
Repeat from * to * across.
Finish with 1 sc in the final ch.
Ch 2, turn.
Rows 2–9
Work 2 dc in the first st.
Sk next 2 sts.
(Sc, 2 dc) in next st, sk next 2 sts.
Repeat from * to * across.
Finish with 1 sc in the final st.
Ch 2, turn.
Continue until you have completed 9 rows total.
Fasten off.
Attaching the Scarf to the Hood
Lay the scarf flat and identify the raised textured sections created by the stitch pattern.
Count 3 textured “puffs” inward from the end of the scarf.
Align the 3rd puff of the scarf with the 1st puff along the lower edge of the hood.
Attach the scarf to the hood using either:
- slip stitches, or
- whip stitch with a yarn needle.
Repeat as needed to secure the hood neatly to the scarf. The source specifically allows either joining method.
Edging
You can begin the edging immediately after joining, or fasten off and rejoin the yarn.
Work sc evenly around the hood opening.
Place 2 sc in each corner area to help the edging lie flat.
Join at the end of the round.
Work a second round of sc edging in the same manner.
Fasten off and weave in all remaining ends.
Buttons
Attach buttons to the scarf section wherever you prefer them for the finished look.
The source treats the buttons mainly as a customizable finishing detail rather than giving an exact number or placement.
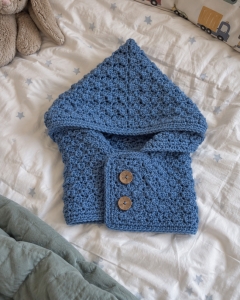
Textured Toddler Hooded Scarf
You can also customize the finishing quite easily. The simple edging around the hood gives the whole piece a neat finished look, while the buttons at the front add just enough detail without taking attention away from the textured stitch.
I hope you enjoy making this Textured Toddler Hood and choosing your own favorite color for it. It is cozy, cute, and just different enough to make the project fun from beginning to end. And as always, thank you for spending a little time here with me at Grandma’s Crafts. I hope you find another project to add to your yarn basket before you leave.