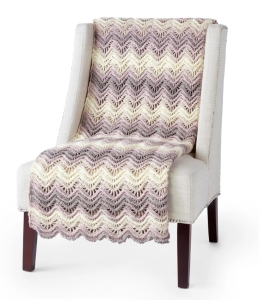
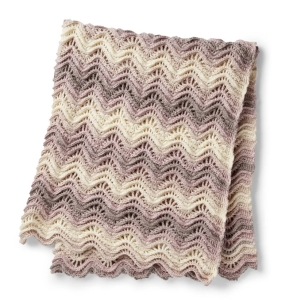
One of the most delightful aspects of this blanket is how soothing it becomes to work on. After a few repeats, your hands begin to recognize the pattern, and the stitches flow almost effortlessly. It becomes a project you can return to at the end of a long day, letting the rhythm of the yarn bring a sense of calm and quiet joy.
Come sit with me for a moment, take your yarn in your hands, and let’s create something truly comforting together.
At first glance, it may look a little complex, but don’t worry, sweetheart. I will guide you slowly, step by step 💛
Materials
You will need:
- Medium weight yarn (such as ombré yarn for a lovely color flow)
- Crochet hook US H/8 (5 mm)
- Yarn needle
Finished size: approximately a cozy throw blanket (as noted on page 1)
Gauge
12 sc × 13 rows = 4″
Pattern gauge: 19 stitches × 8 rows = 4″
Stitches (US Terms)
- ch = chain
- dc = double crochet
- dtr = double treble crochet
- sc = single crochet
- scfp = front post single crochet
The texture in this blanket comes from combining tall stitches with post stitches.
FOUNDATION
Chain a multiple that fits the pattern (as described on page 1).
A helpful tip from the pattern: place markers along your chain to keep count—it makes things much easier.
ROW 1 (Creating the Ripple)
- Dc into the 4th chain from hook
- Work dc across a few stitches
- Then begin the ripple pattern:
- Make several dc into one stitch (this creates a peak)
- Skip stitches (this creates a valley)
Repeat this across the row.
This combination of increases and skips forms the wave shape.
ROW 2 (Adding Texture)
- Ch 1, turn
- Work single crochet across
- Use front post single crochet (scfp) around stitches
This adds a beautiful raised ridge you can feel with your fingers.
ROW 3 (Repeat the Wave)
- Begin again with dc stitches
- Repeat the same ripple shaping (peaks and valleys)
ROW 4
- Repeat Row 2 (texture row)
ROW 5 (Tall Stitches for Elegance)
Now we introduce a taller stitch:
- Ch 5 (counts as dtr)
- Work double treble crochet (dtr) stitches
In certain stitches:
- Work multiple stitches into one (to form peaks)
- Skip stitches (to form valleys)
This creates a more open, decorative wave.
ROW 6 (Textured Ridge)
- Work sc and scfp again
- Include chain spaces where needed
This row defines the structure beautifully.
ROW 7
- Return to dc stitches
- Continue shaping peaks and valleys
ROW 8
- Repeat the textured row (sc and scfp)
MAIN PATTERN
Now, my dear, everything becomes easier:
Repeat Rows 3 through 8
As shown in the diagram on page 2, this creates the repeating ripple design.
Continue until your blanket reaches the desired length.
FINISHING
- End after a texture row for a clean finish
- Fasten off
- Weave in all ends carefully
The finished blanket, measuring a generous size, is perfect for draping over a chair, wrapping around your shoulders, or gifting to someone dear. The soft ripple effect, especially when made with gently changing yarn colors, creates a piece that feels both elegant and cozy—something that will be cherished for years to come.
CROCHET RIPPLE RIDGES BLANKET
As you reach the final rows and fasten off your work, take a moment to admire what you’ve created. Every ridge, every wave, every stitch tells a story of patience and care. And isn’t that what crochet is truly about? Not just the finished piece, but the peaceful journey along the way.
Thank you, my dear, for spending this time with me here at Grandma’s Craft. I warmly invite you to explore our other articles, where many more cozy patterns, gentle guides, and heartfelt inspirations are waiting just for you.