Crochet Slippers

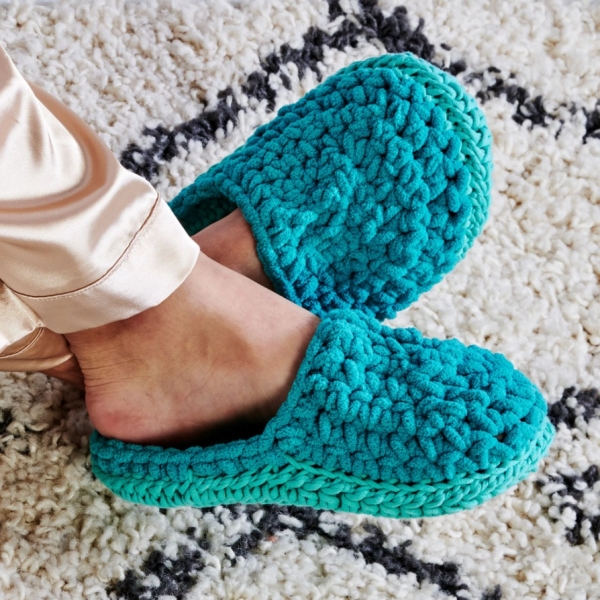
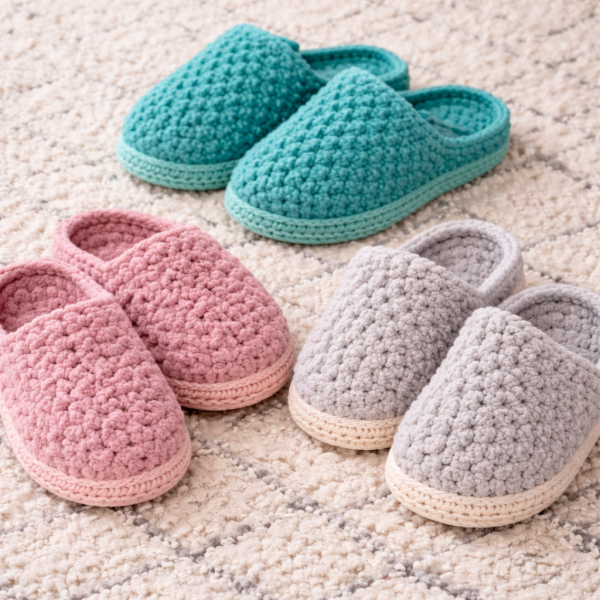
Hello, my dear friends, and welcome to Grandma’s Crafts. Today, I have something special for you! A pair of Crochet Slippers, soft, sturdy, and lovingly handmade for those quiet moments at home.

There is something truly special about crocheting items we can use every single day, don’t you think? This lovely pattern, inspired by the original design found in , is a wonderful example of how simple stitches can come together to create something both practical and beautiful. Much like the cozy and welcoming style we admire in other crochet guides, this project is built step by step, allowing beginners to follow along gently while gaining confidence with each stitch.

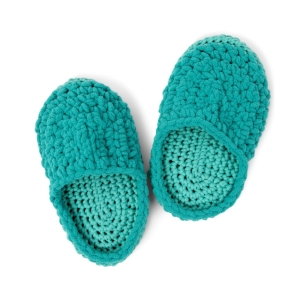
At the heart of these slippers is the simplicity of single crochet, worked in rounds to form a sturdy and comfortable sole. The pattern begins with a small oval shape that gradually grows, much like many beginner-friendly crochet projects. As you continue, the increases at the ends help shape the sole to fit naturally under the foot, creating a smooth and balanced base. It’s a peaceful process, my dear, one that becomes easier with each round as your hands begin to understand the rhythm.

Crochet Slippers

Crochet Slippers

One of the most thoughtful features of this pattern is the double sole construction. By creating both a top and bottom layer and placing a piece of plastic canvas between them, the slippers gain strength and durability. This little detail makes all the difference, transforming a simple crochet piece into something that feels structured and long-lasting. As shown in the diagram on page 2 of the PDF, the oval shape and stitch placement guide you gently through this step.

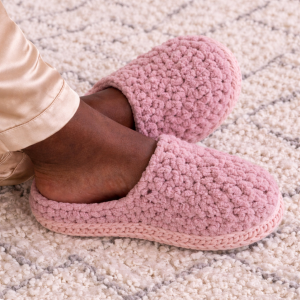
Once the base is complete, the upper part of the slipper begins to take shape. This section is worked back and forth in rows, using simple stitches and gentle decreases to form the curve over the foot. These decreases pull the fabric inward, creating that familiar slipper shape we all love. It may seem a little new at first, but as with many crochet techniques, it quickly becomes intuitive with practice.

As you continue shaping the upper, you’ll notice how the piece begins to fold and form naturally. This is one of those magical moments in crochet, where your work transforms from flat fabric into something three-dimensional and useful. A simple seam at the top completes the shape, giving the slipper its cozy, rounded front.


MATERIALS

You will need:

Super bulky yarn (two colors or types)

One for the sole (stronger yarn)

One for the upper (softer yarn)

Crochet hook US L/11 (8 mm)

Stitch markers

Yarn nedle

Plastic canvas (for structure inside the sole)

Finished size:
Adult size, about 9½ inches long

ABBREVIATION (US TERMS)

  • ch – chain
  • sc – single crochet
  • hdc – half double crochet
  • sl st – slip stitch
  • sc2tog / sc3tog – decreases

PATTERN:

If you can make single crochet, you can do this pattern.

PART 1: UNDERSTANDING THE SLIPPER

Before we begin, let me explain gently how this slipper is made:

You crochet two soles (top + bottom)

You place plastic canvas inside for strength

You sew them together

Then you build the upper part over the sole

Think of it like building a little shoe from the bottom up.


PART 2: MAKING THE SOLE (TOP)

We begin with the base—the part your foot rests on.

Round 1 – Creating the Oval

Start with a chain

Work single crochet across

In the last chain, place multiple stitches

Turn your work slightly and crochet along the other side

This creates an oval shape, not a flat row.

This step is shown clearly in the diagram on page 2.

Rounds 2–5 – Growing the Sole

Now we gently grow the shape:

Work in rounds (do not turn)

Add increases at the curved ends

Think of it like this:

Straight sides → normal stitches

Curved ends → extra stitches

Each round:

Your oval becomes wider and longer

Your slipper begins to take shape

 Round 6 – Shaping with Mixed Stitches

In this round:

You begin using hdc stitches in the center

Keep sc stitches at edges

This creates a more natural foot shape.

Round 7 – Edge Preparation

Work slip stitches (loosely)

Only in front loops

This creates a clean edge for attaching the upper later.

PART 3: MAKING THE SECOND SOLE

Now repeat everything you just did:

Make another sole (same size)

Do not fasten off too tightly

Leave a long tail

Adding Structure (Very Important Step)

As shown on page 2:

Cut plastic canvas in sole shape

Place it between both soles

Align stitches carefully

Sew edges together

This step gives your slipper:

Strength

Durability

A real “shoe” feel

PART 4: MAKING THE UPPER

Now comes the cozy top part of the slipper.

Row 1 – Attaching Yarn

Join yarn at the center front

Work across part of the sole

You will:

Skip stitches

Work single crochet

This creates a flexible base for shaping.

Row 2 – Simple Row

Chain 1

Work single crochet across

Easy and relaxing.

Row 3 – Begin Shaping

Now we shape the toe:

Work normal stitches

Use sc2tog decreases

This pulls the fabric inward.

Row 4 – More Shaping

Continue decreasing

Keep edges straight

Row 5 – Closing the Toe

Use sc3tog for stronger shaping

The top begins to curve beautifully

You will now see the slipper forming!

Closing Seam

Fold the top slightly

Join with slip stitches

This creates the rounded front of the slipper.

PART 5: EDGING

To finish neatly:

Join yarn at side

Work sc evenly around opening

Sometimes:

Skip stitches slightly

This helps shape the opening comfortably

FINAL TOUCHES

Weave in all ends carefully

Adjust shape with your hands

Try them on and smile.


Use stitch markers , they help so much
Keep stitches slightly tight (for structure)
Count your stitches often
Don’t rush, this is a relaxing project

Crochet Slippers

Crochet Slippers

These slippers are more than just something you wear… they are comfort, warmth, and quiet moments stitched together.

Each row you make is a little act of care, for yourself or someone you love.

Take your time, enjoy the softness and let your hands rest in the rhythm of crochet.

The finishing touches bring everything together beautifully. A neat edging around the opening not only adds a polished look but also ensures a comfortable fit. These final stitches are like a gentle frame around your work, highlighting all the care you’ve put into each step.


Chunky Slipper Pattern PDF TUTORIAL


As you reach the end of your project, weaving in the last ends and holding your finished slippers in your hands, take a moment to appreciate what you’ve created. These are not just slippers, they are warmth, comfort, and quiet moments stitched together with care.

Thank you, my dear, for spending this time with me here at Grandma’s Crafts.
I warmly invite you to explore our other articles, where many more cozy patterns and gentle inspirations are waiting just for you.

You Are Here: