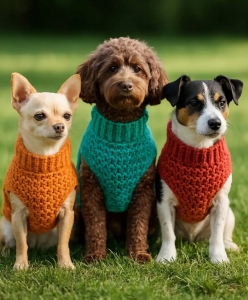
Hello, my dear friends, and welcome to our lovely blog Grandma’s Crafts. Today, I am so delighted to share a pattern that is not only practical, but also filled with love, a charming crochet dog sweater, made to keep our furry companions warm and comfortable.
There is something truly special about crocheting for our pets, don’t you think? They give us so much joy, and creating something by hand just for them feels like a small way of giving that love back. This lovely design, inspired by the original pattern found in , follows a gentle and beginner friendly structure, very much like the welcoming style we admire in other crochet guides. Just as seen in similar tutorials, many dog sweater patterns rely on simple stitches and repetition to make the process approachable and enjoyable, even for those still learning.
At the heart of this pattern is simplicity. The sweater is worked mainly using single crochet, one of the most basic and comforting stitches we learn. This creates a dense, warm fabric, perfect for keeping a little dog cozy on cooler days. The pattern is thoughtfully constructed in two separate pieces, the back and the underpiece, which are later joined together. As explained in the pattern notes, this approach makes the project easier to manage, especially for beginners who may feel unsure about more complex garment construction.
One of the most lovely aspects of this design is how it gently introduces shaping. As you work row by row, small decreases are added near the top of each piece, helping to form the neckline and chest area. It’s a soft and gradual process—nothing rushed or complicated, just a few stitches worked together to create a natural fit. These little details are what transform a simple rectangle into a wearable garment.
And then, my dear, comes one of my favorite parts: the collar. The neckline is finished with a ribbed trim using front and back post stitches, creating a stretchy, textured band. This not only adds a touch of elegance but also helps the sweater sit comfortably around the dog’s neck. It’s such a thoughtful detail, simple yet so effective.
The leg openings and lower edge are finished with neat rounds of stitches, giving the sweater a clean and polished look. These finishing touches may seem small, but they truly bring everything together, turning your work into something complete and ready to wear. As you sew the pieces and shape the final garment, you’ll begin to see it come to life in your hands.
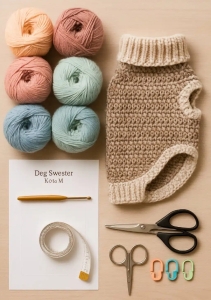
MATERIALS
You will need:
Bulky soft yarn (cozy and warm)
Crochet hook US K/10.5 (6.5 mm)
Yarn needle
Sizes available:
Small, Medium/Large, and Plus sizes
This pattern is worked in simple rows using single crochet.
GAUGE
10 sc × 10 rows = 4 inches
If your stitches are too tight, go up a hook size.
ABBREVIATION (US TERMS)
- ch = chain
- sc = single crochet
- sl st = slip stitch
- sc2tog = single crochet decrease
Special stitches (used for ribbing):
- FPDC = front post double crochet
- BPDC = back post double crochet
These create the stretchy collar.
HOW THIS SWEATER IS BUILT
Before we begin, let me explain gently:
The sweater is made in two simple flat pieces
Back piece – covers the back
Underpiece – goes under the belly
Then we sew them together, leaving openings for the legs.
PART 1: BACK PIECE
Step 1 – Foundation
Chain the required number for your size
As shown on page 3, this creates the width of the back.
Step 2 – Main Body
Work single crochet across each row
Turn and repeat
This is the easiest part:
Same stitch
Same motion
Very relaxing
Continue until the piece reaches the correct length.
Step 3 – Shaping the Top
Now we gently shape the neck area:
At the beginning of the row → sc2tog
Work across
At the end → sc2tog
This reduces stitches and creates a gentle slope.
Repeat this decrease process until the top becomes narrower.
PART 2: UNDERPIECE (BELLY PANEL)
This piece is smaller but made the same way.
Step 1 – Foundation
Chain fewer stitches than the back
Step 2 – Work Even Rows
Single crochet across
Repeat rows
Continue until desired length.
Step 3 – Shape the Top
Use sc2tog at edges
Repeat until only a few stitches remain
This creates a neat taper for the chest area.
PART 3: ASSEMBLY
Now comes the magical part
As explained on page 3:
Place the underpiece over the back piece
Sew sides together starting at the neck
Leave openings for the legs
Continue sewing toward the bottom
Important:
- Do NOT sew the entire bottom closed
- The back stays slightly open for comfort
PART 4: NECK RIBBING
This is where it becomes extra special
Round 1
Work single crochet evenly around neckline
Round 2
Alternate:
FPDC (front post)
BPDC (back post)
This creates a stretchy ribbed collar.
Rounds 3–5
Repeat the same pattern
Now you have a soft, cozy turtleneck!
PART 5: LEG OPENINGS
For each leg opening:
Join yarn
Work single crochet around
Add one round of ribbing (same as collar)
This keeps edges neat and comfortable.
PART 6: LOWER EDGE
Work single crochet around the bottom edge
Add extra stitches at corners
This gives a clean, finished look.
FINAL TOUCHES
Weave in all ends carefully
Gently shape the sweater
Try it on your little friend
This sweater is more than just clothing, it’s warmth, care, and love made visible. Each stitch you place is a little act of kindness for your furry friend.
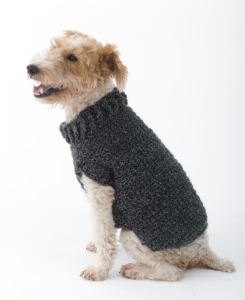
What makes this project especially meaningful is its purpose. A handmade dog sweater is more than just clothing, it’s warmth on a chilly day, comfort during a quiet nap, and a little expression of love stitched into every row. Many crochet pet projects are designed exactly with this in mind: combining function with affection, creating something both useful and heartfelt.
As you work through this pattern, you may find the rhythm soothing and familiar. That is the quiet beauty of crochet, my dear, the way simple stitches, repeated with care, can bring both calm and joy. And when your little companion wears the finished sweater, you’ll know that every stitch was made with love.
Thank you for spending this time with me here at Grandma’s Crafts.
I warmly invite you to explore our other articles, where many more cozy patterns, gentle guides, and handmade inspirations are waiting just for you.


