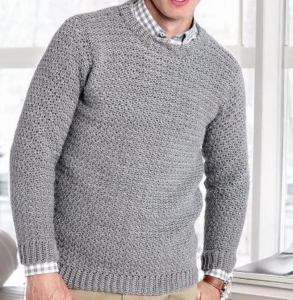
Come sit beside me, take your yarn in your hands, and let’s create something warm and comforting together. Today we’ll make a lovely crew neck pullover, a timeless piece that feels like a soft hug when worn.
Don’t worry if garments feel intimidating, I’ll guide you slowly, step by step
Materials
You will need:
- Worsted weight yarn
- Crochet hook US H/8 (5 mm) (or size needed for gauge)
- 4 stitch markers
- Yarn needle
Gauge
- 13 stitches × 11 rows = 4 inches (10 cm) in pattern
Take a moment to check this, sweetheart — it helps your sweater fit just right.
Stitches (US Terms)
- ch = chain
- sc = single crochet
- dc = double crochet
- sl st = slip stitch
- sc blo = single crochet in back loop only
- sc2tog = single crochet 2 together
The fabric uses a soft alternating pattern of sc and dc, creating a gentle texture.
BACK PANEL
Ribbing
- Chain 10
- Row 1: sc in 2nd ch from hook, sc across
- Row 2: ch 1, sc blo across
Repeat Row 2 until your ribbing reaches the required width.
This creates that lovely stretchy bottom edge.
Body
Now turn your work and crochet along the long edge of the ribbing:
- Evenly place single crochet stitches across
Then begin pattern:
Row 1: ch 1, sc, dc in next, sc in next repeat
Row 2: ch 3, sc in dc, dc in sc repeat
Row 3: ch 1, dc in sc, sc in dc repeat
Repeat Rows 2–3 until the piece reaches the desired length.
Armholes
To shape the armholes:
- Skip stitches at the beginning of the row
- Continue working across the center stitches only
This creates space for the sleeves.
Shoulders
Work each shoulder separately:
- Skip stitches near edges
- Crochet remaining stitches
- Fasten off
FRONT PANEL
The front begins just like the back, same ribbing and same stitch pattern.
But here, we gently shape the neckline
Neck Shaping
When you reach the upper section:
- Work only part of the stitches
- Leave center stitches unworked (this forms the round neck)
Then:
- Decrease using sc2tog along the neck edge
- Repeat decreases gradually to shape the curve
Shoulders
Once the neckline is shaped:
- Work shoulders separately, just like the back
- Fasten off
SLEEVES
Ribbing (Cuffs)
Same as before:
- Chain 10
- Work sc blo rows
Sleeve Body
Work along the edge of the ribbing and begin the pattern stitch.
Increasing
To shape the sleeve:
- Add stitches at both ends every few rows
- Continue until sleeve reaches desired width
This makes the sleeve comfortable and natural-fitting.
Length
Continue without increasing until the sleeve reaches the full length.
Place markers at the top — this helps with assembly.
FINISHING
Now we bring everything together, gently and patiently.
Assembly
- Sew one shoulder seam first
Neckband
- Chain a small strip (like the ribbing)
- Work sc blo rows
- Attach it around the neckline as you go
Keep it slightly stretchy so it sits nicely.
Final Steps
- Sew the second shoulder
- Attach sleeves
- Sew sides and sleeve seams
Take a deep breath… you did it 💕
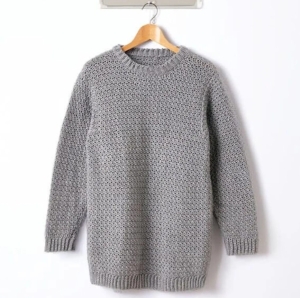
My dear, this pullover is more than yarn and stitches, it’s time, care, and love woven into every row.
CROCHET PULLOVER PDF PATTERN
As we come to the end of this gentle journey, I hope this pattern inspires you to continue exploring the wonderful world of crochet with confidence and joy. Every project you create is a reflection of your care and creativity. Thank you for spending this time with me here at Grandma’s Craft, and I warmly invite you to explore our other articles, where many more cozy ideas, patterns, and inspirations are waiting just for you 💕🧶
Don’t rush.
Enjoy the rhythm.
And be proud of every stitch you make.