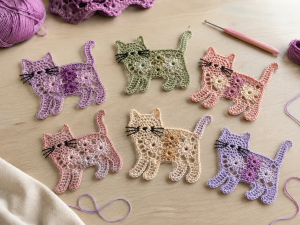
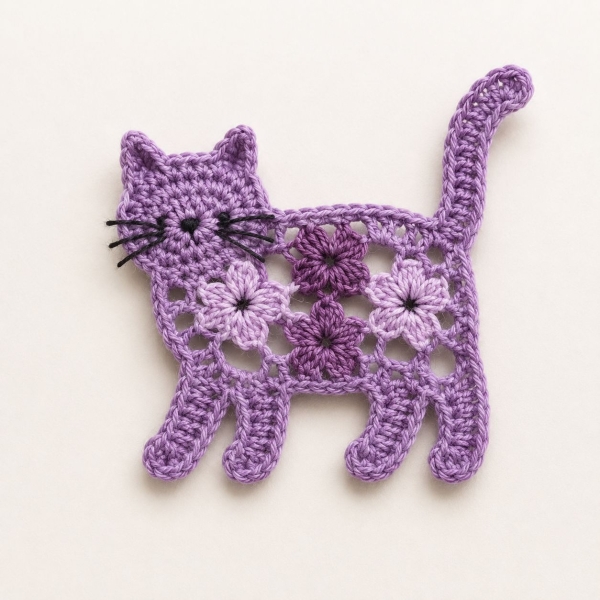
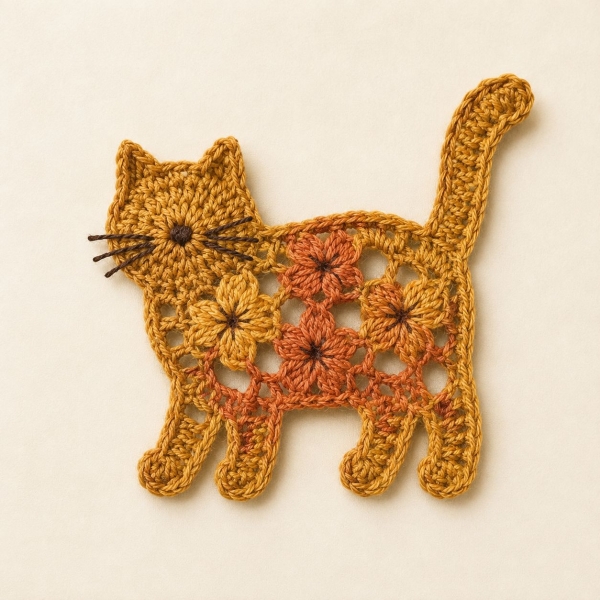
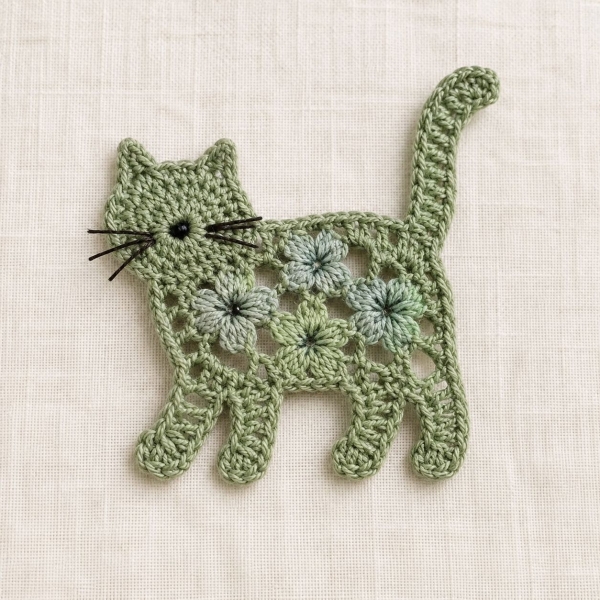
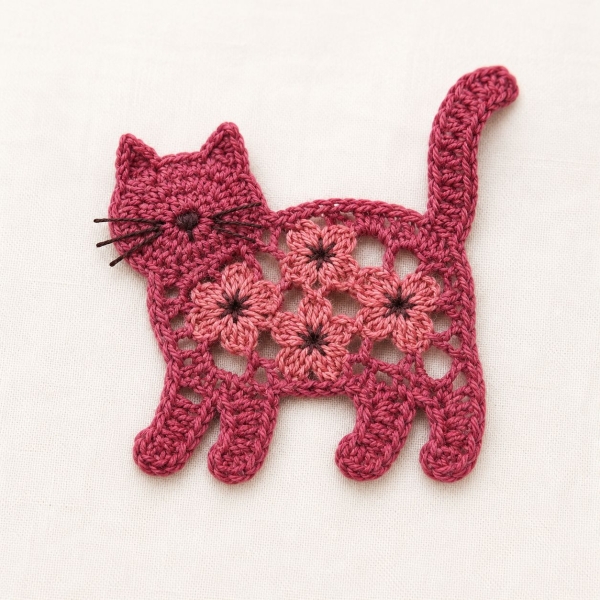
This adorable little crochet cat combines two things we absolutely love: flowers and crochet animals! Instead of working the body as one solid piece, this design begins with four small flower motifs that are joined together and surrounded by a delicate openwork frame. The legs, curved tail, neck, and head are then added to transform the floral center into a charming cat-shaped appliqué.
The finished project is lightweight, decorative, and perfect for using small amounts of leftover yarn. Try making it in one solid shade for a classic lace look, or choose different colors for the flowers to make the design even more playful.
This pattern uses US crochet terminology.
What You’ll Need
- Fingering or lightweight cotton yarn
- Approximately 2.25–3 mm crochet hook, or a size suitable for your yarn
- Yarn needle
- Scissors
- Blocking pins
There is no strict gauge for this project. Fine yarn will give you a smaller and more delicate cat, while thicker yarn will naturally produce a larger appliqué.
Crochet Abbreviations
- ch – chain
- st / sts – stitch / stitches
- sl st – slip stitch
- sc – single crochet
- hdc – half double crochet
- dc – double crochet
- tr – treble crochet
- sp – space
- ch-sp – chain space
- MR – magic ring
- rep – repeat
- FO – fasten off
Picot
Ch 3, then sl st into the first ch.
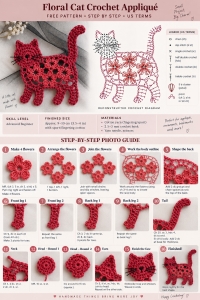
Step 1 – Make the Four Flowers
The center of the cat is made from four five-petal flowers.
Flower Motif
Make a MR.
For the first petal:
Ch 3, work 4 tr into the MR, ch 3, sl st into the MR.
Repeat:
[Ch 3, 4 tr into MR, ch 3, sl st into MR]
four more times.
You should now have 5 petals.
Pull the magic ring closed and join with a sl st near the base of the first petal.
FO.
Make 4 flowers altogether.
Helpful tip: Keep the magic ring slightly loose while making the petals. Once all five are complete, pull the center closed. This gives you more room to work the tr stitches comfortably.
Step 2 – Position the Flowers
Lay the four flowers on a flat surface before joining them.
Arrange them approximately like this:
Think of the arrangement as a loose diamond rather than a perfect square.
- Flower A sits toward the front of the cat.
- Flower B forms the upper-middle section.
- Flower C sits toward the rear.
- Flower D fills the lower-middle area.
Leave a little space between the flowers. The gaps are intentional and help create the open lace effect of the finished body.
Step 3 – Secure the Flower Motifs
Using matching yarn and a yarn needle, lightly secure the neighboring petals together.
Join:
- Flower A to Flower B
- Flower B to Flower C
- Flower A to Flower D
- Flower D to Flower C
Use only a few small stitches at each connection.
Do not pull the motifs tightly together. Keep a small space between them so the body remains open and airy.
These small joins simply hold everything in position while you crochet around the flowers.
Step 4 – Crochet Around the Floral Body
Join your yarn with a sl st to an outside petal of Flower A, close to the upper-left portion of the body.
Ch 1 and sc in the same area.
Now work around the outside of the four flowers:
Ch 3, sc into the next outer petal or joining point.
Continue repeating this sequence around the flower arrangement.
Whenever you need to cross a slightly wider gap, use:
Ch 4 instead of ch 3.
Once you have worked all the way around, join with a sl st to the first sc.
The idea is to create an irregular but balanced openwork border around the flowers.
You do not need to crochet into every stitch of every petal. Attach mainly to the outer tips and edges so the floral motifs remain clearly visible.
Step 5 – Give the Cat a Curved Back
Move to the chain spaces above Flowers B and C.
Join yarn in the first upper ch-sp.
Ch 3.
Work:
2 dc in the same ch-sp.
In the following ch-sp:
2 dc, ch 2, 2 dc.
In the next ch-sp:
2 dc.
Then:
Ch 2, sc in the next ch-sp.
FO.
This additional row creates the slight curve along the cat’s back.
Step 6 – First Front Leg
Join yarn to a lower chain space underneath Flower A.
Ch 9.
Beginning in the 4th ch from the hook, work:
Dc in each remaining ch.
At the bottom of the leg, make the toes:
Ch 3, sl st in the same st.
Repeat twice more so you have three small toe loops.
FO.
Step 7 – Second Front Leg
Skip approximately one lower body ch-sp.
Join yarn to the next suitable space.
Ch 9.
Beginning in the 4th ch from the hook:
Dc in each remaining ch.
For the paw:
[Ch 3, sl st in the same st] 3 times.
FO.
The legs do not need to be perfectly identical in angle. A slight difference can actually make the appliqué look more natural.
Step 8 – First Back Leg
Join yarn to a lower chain space underneath Flower C.
Ch 3.
Work:
2 dc in the same ch-sp.
Then ch 8.
Beginning in the 4th ch from the hook:
Dc in each remaining ch.
Finish the paw with:
[Ch 3, sl st in the same st] 3 times.
FO.
The extra dc stitches at the top help make the back leg look slightly fuller.
Step 9 – Second Back Leg
Join yarn to the next suitable lower space toward the back of the body.
Ch 3.
Work:
2 dc in the same ch-sp.
Ch 8.
Beginning in the 4th ch from the hook:
Dc in each remaining ch.
Make the toes:
[Ch 3, sl st in the same st] 3 times.
FO.
At this stage, your cat should have all four legs.
Step 10 – Crochet the Tail
Join yarn to the upper-right outer chain space of Flower C.
Ch 20.
Starting in the second ch from the hook:
- Sc in next 3 ch
- Hdc in next 4 ch
- Dc in each remaining ch
Sl st back into the same body space where the tail began.
For a wider base, work 2 dc into the body ch-sp before fastening off.
FO.
Want a More Curved Tail?
When beginning the return row, work:
2 sc in each of the first 2 ch.
This adds extra stitches near the tip and encourages the tail to curve.
Step 11 – Add the Neck
Join yarn to an upper chain space above Flower A, toward Flower B.
Ch 3.
Work:
2 dc in the same sp.
Ch 2.
Work:
2 dc in the next upper ch-sp.
Ch 2.
Sc into the next connection point.
Do not fasten off yet, because the head will continue from here.
Step 12 – Crochet the Head
Unlike the open floral body, the head is worked more densely.
Ch 4.
Join with a sl st to the first ch to form a small ring.
Round 1
Ch 1.
Work 10 sc into the ring.
Join with a sl st.
Round 2
Ch 1.
Work:
2 sc in next st, sc in next st
around until you have approximately 15 sts.
Join with a sl st.
Do not FO.
The stitch count can be adjusted slightly if necessary. The main goal is to create a small rounded head that remains proportionate to the body.
Step 13 – First Ear
Ch 5.
Beginning in the second ch from the hook, work:
- Sl st in next ch
- Sc in next ch
- Hdc in next ch
- Dc in last ch
Skip 1 st along the head.
Sl st into the following st.
You should now have a small pointed ear.
Step 14 – Work Across the Top of the Head
Sc in the next 3–4 sts.
You can slightly adjust this number depending on your tension and the size of the head.
You simply need enough space between the two ears to give the cat a balanced shape.
Step 15 – Second Ear
Ch 5.
Starting in the second ch from the hook:
- Sl st in next ch
- Sc in next ch
- Hdc in next ch
- Dc in last ch
Skip 1 head st.
Sl st into the next st.
Continue working sc down the side of the head until you reach the neck.
Sl st into the neck.
FO.
Step 16 – Shape the Face
If you would like a slightly wider muzzle, join yarn near the lower side of the head.
Ch 1.
Sc in next 2 sts.
Work:
2 sc in next st.
Sc in next 2 sts.
Sl st and FO.
Repeat on the opposite side if necessary.
These small increases help form the cheeks without making the head too bulky.
Step 17 – Add the Nose
Thread a small piece of contrasting yarn onto your yarn needle.
Embroider one short horizontal stitch near the center of the face.
Add one tiny vertical stitch underneath.
Keep the nose small so it does not overpower the delicate crochet design.
Step 18 – Add the Whiskers
Using your yarn needle, make three long straight stitches extending outward from each side of the muzzle.
You can also crochet the whiskers if you prefer.
Attach yarn beside the face and work:
- Ch 5, sl st back to face
- Ch 6, sl st back to face
- Ch 5, sl st back to face
Repeat on the opposite side.
For such a small appliqué, embroidered whiskers will usually give the neatest result.
Finishing Your Crochet Cat
Weave in all yarn ends carefully.
Try not to pull too firmly while weaving through the openwork sections, as this can distort the flower motifs.
Do not worry if your cat looks a little uneven before blocking — the final shaping makes a big difference.
Blocking
Lightly dampen the finished appliqué.
Place it on a blocking mat or a folded towel.
Carefully arrange:
- the ears
- head and face
- back
- four flowers
- four legs
- paws
- tail
Pin everything into the desired position.
Gently open the chain spaces without overstretching them.
Leave the appliqué in place until it is completely dry. Blocking is especially useful here because it sharpens the cat silhouette and helps the open floral body sit flat.
Quick Construction Overview
If you want an easy way to remember how the project comes together:
Make 4 flowers → arrange and join them → crochet the open body → shape the back → add 4 legs → crochet the tail → add the neck → make the head and ears → embroider the face → block.
Thank you so much for visiting Grandma’s Crafts and spending a little creative time with us! We hope you enjoyed this Crochet Flower Cat Appliqué and that it inspires you to try new colors, yarn combinations, and ways to use the finished piece. Before you go, be sure to explore some of the other articles on the blog, where you’ll find plenty of fun, unique, and different crochet patterns to add to your project list.
We’re always working on something new here at Grandma’s Crafts, and the blog is updated every week with fresh patterns, handmade ideas, and creative inspiration. So it’s definitely worth checking back often to see what’s new. Thank you again for stopping by, and we hope to see you here again very soon for another lovely crochet project!