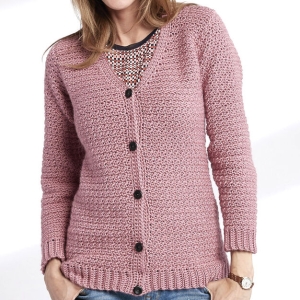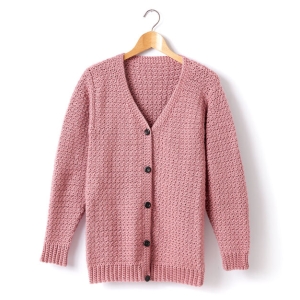
This cardigan is worked in separate pieces; back, fronts, and sleeves and then gently assembled at the end.
Materials
You will need:
- Medium (worsted) weight yarn
- Crochet hook size US H/8 (5 mm) (or size to match gauge)
- 4 stitch markers
- 5 buttons
- Yarn needle
Gauge
13 stitches × 11 rows = 4 inches (10 cm) in pattern
Take your time with this step, dear, a little swatch saves a lot of trouble later 💕
Stitches Used (US Terms)
- ch = chain
- sc = single crochet
- dc = double crochet
- sl st = slip stitch
- sc2tog = single crochet 2 stitches together
- sc blo = single crochet in back loop only
The main pattern is a gentle alternation of sc and dc, giving a soft texture.
BACK PANEL
Ribbing (Bottom Edge)
- Chain 10
- Row 1: sc in 2nd chain from hook, sc across
- Row 2: ch 1, sc blo across
Repeat Row 2 until your ribbing reaches the desired width (this forms the stretch at the bottom).
Tip: It should be slightly stretchy, not tight.
Body
Now we turn and work along the side of the ribbing:
- Evenly place single crochets across the long edge
- Begin pattern:
Row 1: ch 1, sc, dc in next, sc in next repeat
Row 2: ch 3, sc in dc, dc in sc repeat
Row 3: ch 1, dc in sc, sc in dc repeat
Repeat Rows 2–3 to build the fabric.
Armholes
When the piece reaches the correct length:
- Skip stitches at both ends
- Continue working only the center stitches
This creates space for the arms.
Shoulders
Work each shoulder separately:
- Skip stitches at edges
- Crochet remaining stitches
- Fasten off
LEFT FRONT
Work just like the back, but narrower.
Important difference:
You will shape the V-neck:
- Gradually decrease stitches at the front edge
- Use sc2tog to gently slope the neckline
Take it slow here, shaping is like sculpting, little by little 💛
RIGHT FRONT
Repeat the left front, but mirrored.
The neckline decreases happen on the opposite side.
SLEEVES
Ribbing (Cuffs)
Same as before:
- Chain 10
- Work sc blo rows
Sleeve Body
- Work along the ribbing edge
- Follow the same pattern stitch
Increasing
To widen the sleeve:
- Add stitches at both ends every few rows
This gives a comfortable sleeve shape.
FINISHING
Now comes the most satisfying part ✨
Assembly
- Sew shoulder seams
- Attach sleeves
- Sew sides and sleeve seams
Button Band
Work single crochet all around the front edges and neckline.
For buttonholes:
- Chain 2
- Skip 2 stitches
- Continue across
Space them evenly — like little pearls 🌼
Final Touch
Sew buttons opposite the buttonholes.
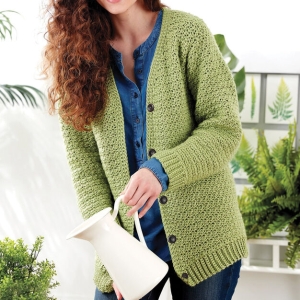
As we come to the end of this gentle journey, I hope this cardigan inspires you to keep exploring, learning, and creating with love. There is always something new to discover in the world of crochet, and every project holds a story waiting to be told. Thank you for spending this time with me here at Grandma’s Craft, and don’t forget to take a peek at our other articles, where many more cozy ideas and heartfelt patterns are waiting just for you 💕
CROCHET CARDIGAN PDF PATTERN
My dear, this cardigan is not just stitches, it’s patience, warmth, and love woven together.
Take your time.
Rest your hands when needed.
And remember… every stitch is progress.