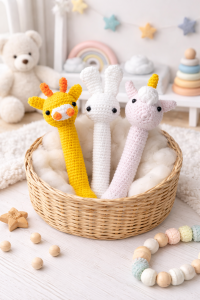
Materials
You will need:
- Soft cotton yarn in a few colors
- Crochet hook (approximately 2.25 mm / US B)
- Fiberfill stuffing
- Safety eyes (small size)
- Yarn needle, pins, and scissors
Finished size:
About 14 cm tall (from bottom to head, as noted on page 2)
Stitches (US Terms)
- ch = chain
- sc = single crochet
- hdc = half double crochet
- dc = double crochet
- inc = increase (2 sc in one stitch)
- dec = decrease (sc2tog)
- sl st = slip stitch
All pieces are worked in continuous rounds.
BASIC STRUCTURE (Applies to All Designs)
Each rattle is made from:
- Head (round and stuffed)
- Body/Handle (long and narrow)
- Small details (ears, horns, or decorations)
As shown throughout the PDF (pages 3–12), each animal follows a similar construction.
HEAD (General Method)
You will begin with a magic ring:
- Start with a small circle
- Increase gradually each round
- Work even rounds to build height
- Then decrease to close
According to page 3, the eyes are placed around the middle rounds, spaced evenly.
Stuff the head firmly before closing.
BODY / HANDLE
The handle is long and comfortable for little hands:
- Begin with a magic ring
- Increase to a small width
- Then work many rounds evenly
As shown on page 3, the body is worked for quite a few rounds to create a smooth tube.
Stuff lightly so it stays soft but holds shape.
DETAILS (Each Animal)
Now comes the fun part, my dear.
Bunny
- Long ears worked in rounds
- Sewed gently to the top of the head
As seen on page 4, the ears are soft and slightly shaped.
Giraffe
- Small ears
- Little horns (stuffed lightly)
- A separate mouth piece with tiny nostrils
Pages 6–8 show how these pieces are sewn together to form the sweet face.
Unicorn
- Small ears
- A tiny horn
- A curly mane made from chains and stitches
As shown on pages 11–12, the mane is placed carefully to create a natural, flowing look.
ASSEMBLY
This is where everything comes to life
- Attach head to body securely
- Sew on ears, horns, or details
- Place safety eyes evenly
- Add facial features if desired
Take your time here, this step brings personality to your little toy.
FINAL TOUCHES
- Weave in all ends carefully
- Adjust stuffing if needed
- Shape gently with your hands
And just like that… your little rattle is ready.
As you continue working, you may find that this pattern becomes a peaceful companion. The repetition of stitches, the gentle shaping, and the small details all come together in a rhythm that is both calming and joyful. It’s the kind of project you can enjoy slowly, savoring each step as your little creation begins to take form.
And when everything is assembled when the head is attached, the features are in place, and the final touches are complete… you are left with something truly meaningful. Not just a toy, but a piece made with love, care, and intention. It’s the kind of handmade gift that carries warmth far beyond the stitches themselves.
CROCHET TOY PDF PATTERN
Thank you, my dear, for spending this time with me here at Grandma’s Crafts. I warmly invite you to explore our other articles, where many more cozy patterns and gentle inspirations are waiting just for you.
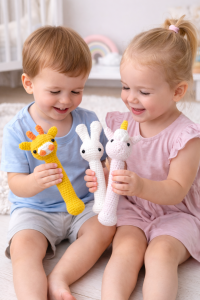
My dear, this tiny toy is more than just stitches, it’s something made with love, care, and tenderness. Perfect for a little one, or even as a heartfelt handmade gift.
Take your time.
Enjoy each stitch.
And remember: every little piece you create carries warmth within it.