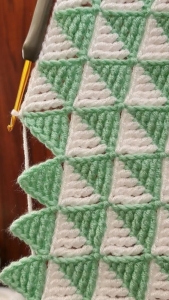
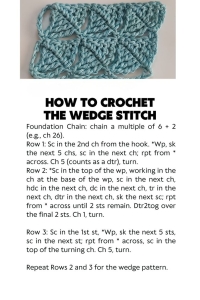
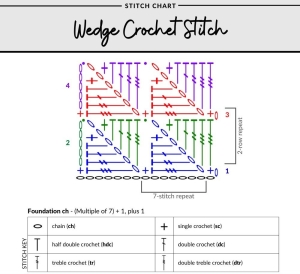
Welcome, dear friends of Grandma’s Crafts! Pull up a chair and bring a little yarn from your stash. Today we’re going to make a crochet stitch with tiny points that fit together like pieces of a puzzle. The first row looks like a string of little triangles. When you turn the work and crochet back across them, you’ll see how those triangles become a textured fabric.
I like to try a new stitch on a small swatch before deciding what to make with it. Three wedges are enough for this one. You’ll get to practice each part several times, and you can lay the piece on the table to see how the edges line up. If the first wedge comes out a little wonky, give yourself another try. There’s no need to start the whole swatch over.
What You’ll Need
Smooth yarn in a light color so you can see the chains beneath each wedge.
A crochet hook suited to your yarn.
Two removable stitch markers.
Scissors and a yarn needle.
US Crochet Terms
ch: chain
st: stitch
sc: single crochet
hdc: half double crochet
dc: double crochet
tr: treble crochet, starting with two yarn overs
quad: the tall stitch used here, starting with three yarn overs
quad2tog: two quad stitches joined at the top
yo: yarn over
WP: wedge picot
Practice the Two Special Stitches
Wedge picot: Ch 6. Starting in the second chain from your hook, work these five stitches in order, one per chain: sc, hdc, dc, tr, quad. The short stitch is at the tip and the tall stitch is at the base. The loop already on your hook never counts as a chain.
Quad: Wrap the yarn around the hook three times. Insert the hook where indicated, yo, and pull up a loop. You’ll have five loops on your hook. Yo and pull through two loops four times. One loop remains.
Quad2tog: Begin a quad in the first indicated spot, but make only three of the four pull-throughs. Leave its last two loops on the hook. Start another quad in the second spot and again stop after three pull-throughs. You’ll now have three loops on the hook. Yo and draw through all three to join the stitches.
Foundation Chain
Ch 20 for a practice swatch with three wedges. To make it wider, start with a multiple of six plus two: 14 chains make two wedges, 20 make three, 26 make four, and 32 make five.
Row 1: Make the First Wedges
Sc in the second foundation chain from the hook.
Make a WP. Skip five chains on the original foundation and sc in the sixth.
Repeat Step 2 twice more for the 20-chain swatch. The third wedge ends with an sc in the last foundation chain. Turn.
If you’re having trouble finding the sixth chain after you make a wedge, put a marker in it before starting the wedge. That way, you can find your anchor without counting again.
Row 2: Fill In the Spaces Between the Wedges
Ch 5 to stand in for the first quad. Move straight to the tip of the nearest wedge and work an sc there.
Turn the wedge gently toward you so you can see the unused side of its chain. Along that underside, work sc, hdc, dc, tr, quad across five consecutive chains. Skip the sc anchor between this wedge and the next.
Sc into the next wedge tip and repeat the same sequence underneath. On the final wedge, stop after the tr, leaving its fifth underside chain and the edge sc unworked.
Work quad2tog over those two remaining spots, using the underside chain first and the edge sc second. Turn.
The underside chains belong to the little wedge you made, not the long foundation you started with. If you’re unsure which strand to use, trace the wedge from its tip back toward its base with your fingertip. For the three-wedge swatch, the completed row has 19 stitches, counting the starting ch 5 as one stitch.
Row 3: Make the Next Set of Wedges
Ch 1 and sc in the first stitch. The ch 1 does not count as a stitch.
Make a WP, skip five stitches of Row 2, and sc in the following stitch.
Repeat across. Anchor the final wedge with an sc in the top of the ch 5 from the previous row. Turn.
If that last chain is hard to spot, put a marker in the fifth chain as soon as you make it on each Row 2. It’ll be waiting for you at the far edge of Row 3.
Repeat and Finish
Keep alternating Rows 2 and 3 until the piece is as long as you want it. End after Row 2 for a filled edge, or after Row 3 if you want the little points to show. Cut the yarn, pull the tail through the last loop, and weave in both ends.
Before starting a larger piece, measure your swatch after it has had a chance to relax. A narrow strip is a good way to try out the texture for a scarf. If you’re thinking about a blanket, make a slightly larger swatch first so you can see how the fabric feels and how much it stretches.
VIDEO TUTORIAL
Thank you for spending a little time with me here at Grandma’s Crafts. Good luck with your first swatch, dear friend! I hope you enjoy the moment when those little wedges start fitting together. Happy crocheting, and I’ll see you soon for another project.