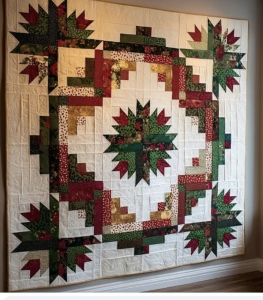
Cut one 2½-inch center square and twelve 1½-inch-wide strips. Cut the strip lengths below in the order they’ll be sewn.
| Round |
Strip lengths in sewing order |
| 1 |
2½, 3½, 3½, and 4½ inches |
| 2 |
4½, 5½, 5½, and 6½ inches |
| 3 |
6½, 7½, 7½, and 8½ inches |
Use a ¼-inch seam allowance. Sew the first strip to one side of the center square. Press the seam toward the new strip, then turn the block a quarter turn in the same direction. Sew the next strip along the edge you’ve just lengthened. Continue in that order, pressing after each seam.
Try two neighboring sides in light fabrics and the other two in greens or reds. When the block is finished, rotate it on the table. Notice how the darker half changes direction even though you haven’t changed a single seam. That’s what makes the wreath layout work.
Arrange the Pine Blocks and Build the Wreath
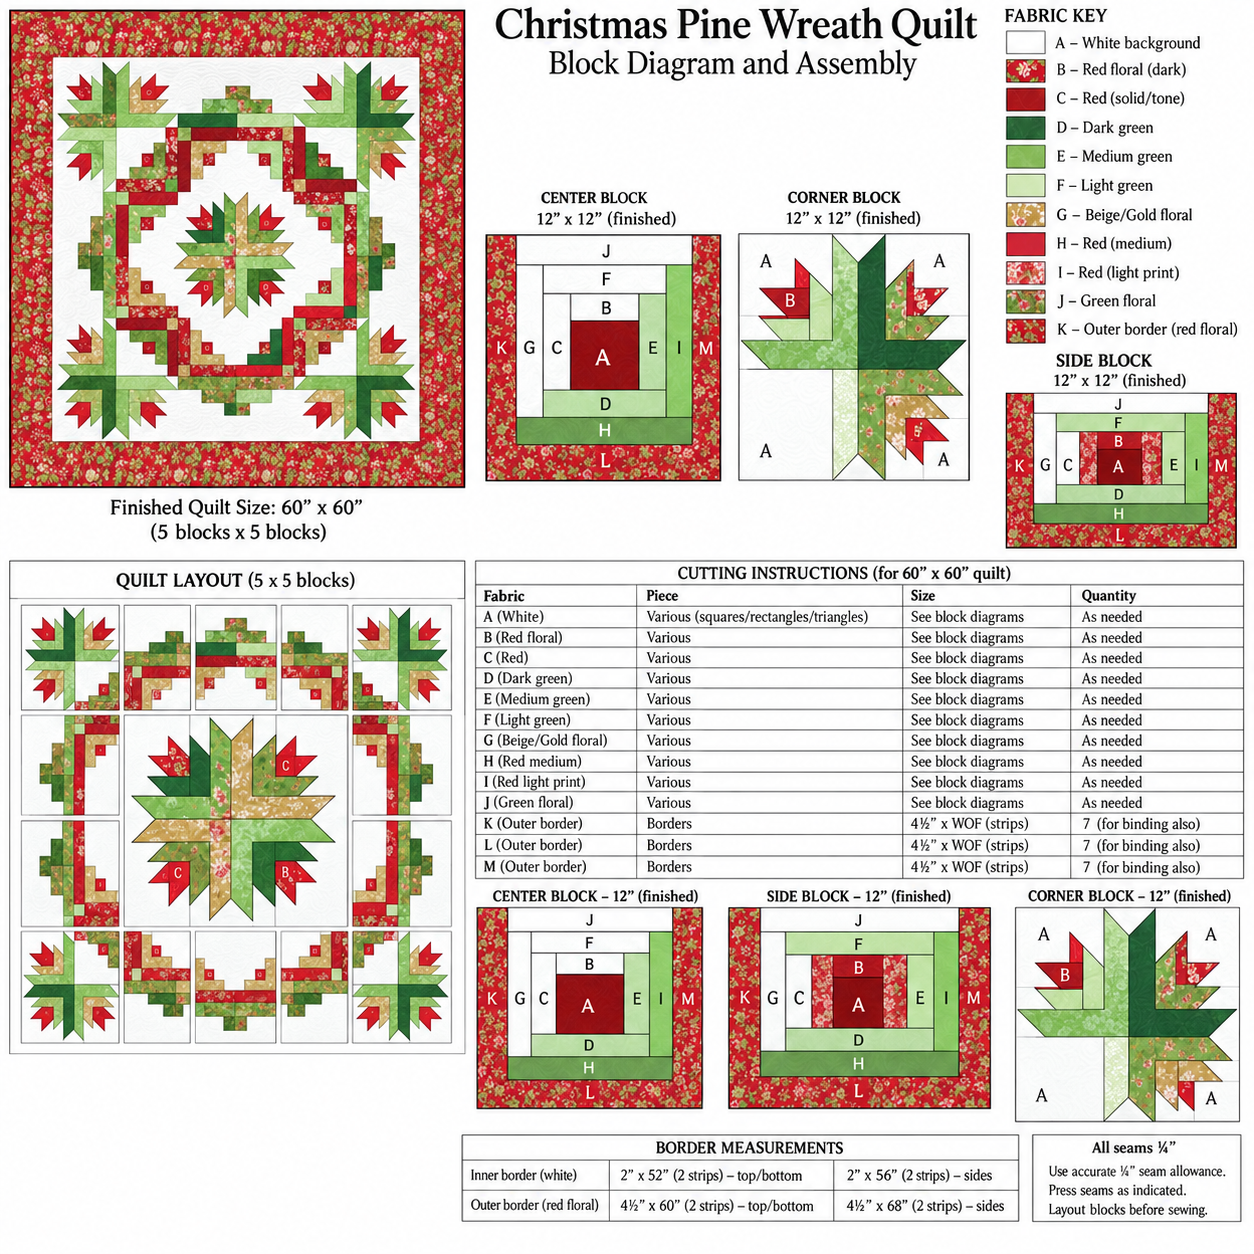
Lay out the pine blocks at the corners, then position the Log Cabin sections between them. Turn each section until its colored strips lead naturally into the next part of the wreath. Once the outer shape looks right, place the center pine motif and check that there’s enough light background around it to keep it distinct.
When sewing the pointed pieces, handle diagonal edges gently so they keep their shape. As you join the units, look for about ¼ inch of fabric beyond each point at the raw edge. That space gives the next seam room to pass without clipping the tip.
Take a photo of the complete layout before picking up any blocks. Label each row and mark the left end with a scrap of paper or a pin. It’s surprisingly easy to turn a block around between the table and the sewing machine, and that photo makes it easy to put things right.
Sew the Quilt Top and Add the Border
Join the blocks in rows, then sew the rows together. Where your seam allowances can face opposite directions, press them that way so the seams can nest when you join the rows. Pin the intersections first, then check that the rest of the edges line up.
A narrow cream border gives the wreath a little breathing room before a wider red floral border. Measure through the middle of the quilt top when sizing the border strips. Match the midpoint and ends of each strip to the quilt before pinning the rest.
For the quilting, you could follow the lines of the Log Cabin strips and add a few curved lines in the open background. If you prefer to keep things simple, try evenly spaced straight lines across the quilt. The fabric and patchwork already give the design plenty to look at.
View the Christmas Pine Wreath Quilt Layout
Look at the quilt layout and block illustrations before cutting for the full project. Pay particular attention to which way the colored strips face and where the pine points meet the surrounding blocks.
VIEW THE CHRISTMAS PINE WREATH QUILT LAYOUT
Thank you for spending a little time with me here at Grandma’s Crafts. Good luck with your Christmas wreath quilt, dear friend! Start with that first little Log Cabin block, and give yourself time to enjoy watching it grow with each strip you add. I hope your finished quilt finds a special place in your home when the Christmas decorations come out. Happy quilting, and I’ll see you soon for another project!